Bundespolizei CTF 2025 Walkthrough: Cracking the Code of Germany's Federal Police 🚔
What’s up, fellow hackers and puzzle solvers! Alex here, ready to spill the secrets.
When I saw the Bundespolizei CTF pop up, I knew I had to jump in. How often do you get to test your skills against a challenge hosted by the German Federal Police? I mean, who wouldn’t want to virtually “break into” the Bundespolizei (in the most legal way possible)?
This writeup documents my journey through the most engaging challenges of the CTF, covering everything from reverse engineering to deep-dive forensics. Let’s break down how we snatched the flags and, hopefully, you can learn a new trick or two for your next competition.
Challenge 1: Forensics 🕵️♂️
In the first challenge, we were provided with a FAT32 filesystem containing the flag—and, naturally, a small rabbit hole.
If you tried to simply mount the disk image, you’d be greeted by a message that essentially said, “Not so fast, pal!” Since there were no files immediately visible, I knew the flag was probably deleted or hidden. I quickly shifted gears and loaded the image into Autopsy. Lo and behold, this recovered a file named flag.png, which contained the actual flag. File carving for the win!
Files on the disk image. Flag recovered using Autopsy.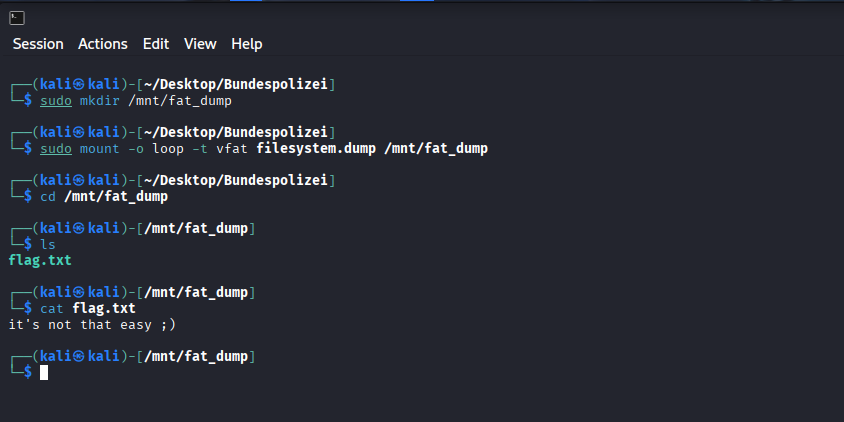
Flag 1: file_reconstruction_works
Challenge 2: Misc (PDF Magic) ✨
In this challenge, we were given an organigram (organizational chart) as a .pdf file, which reportedly contained the flag.
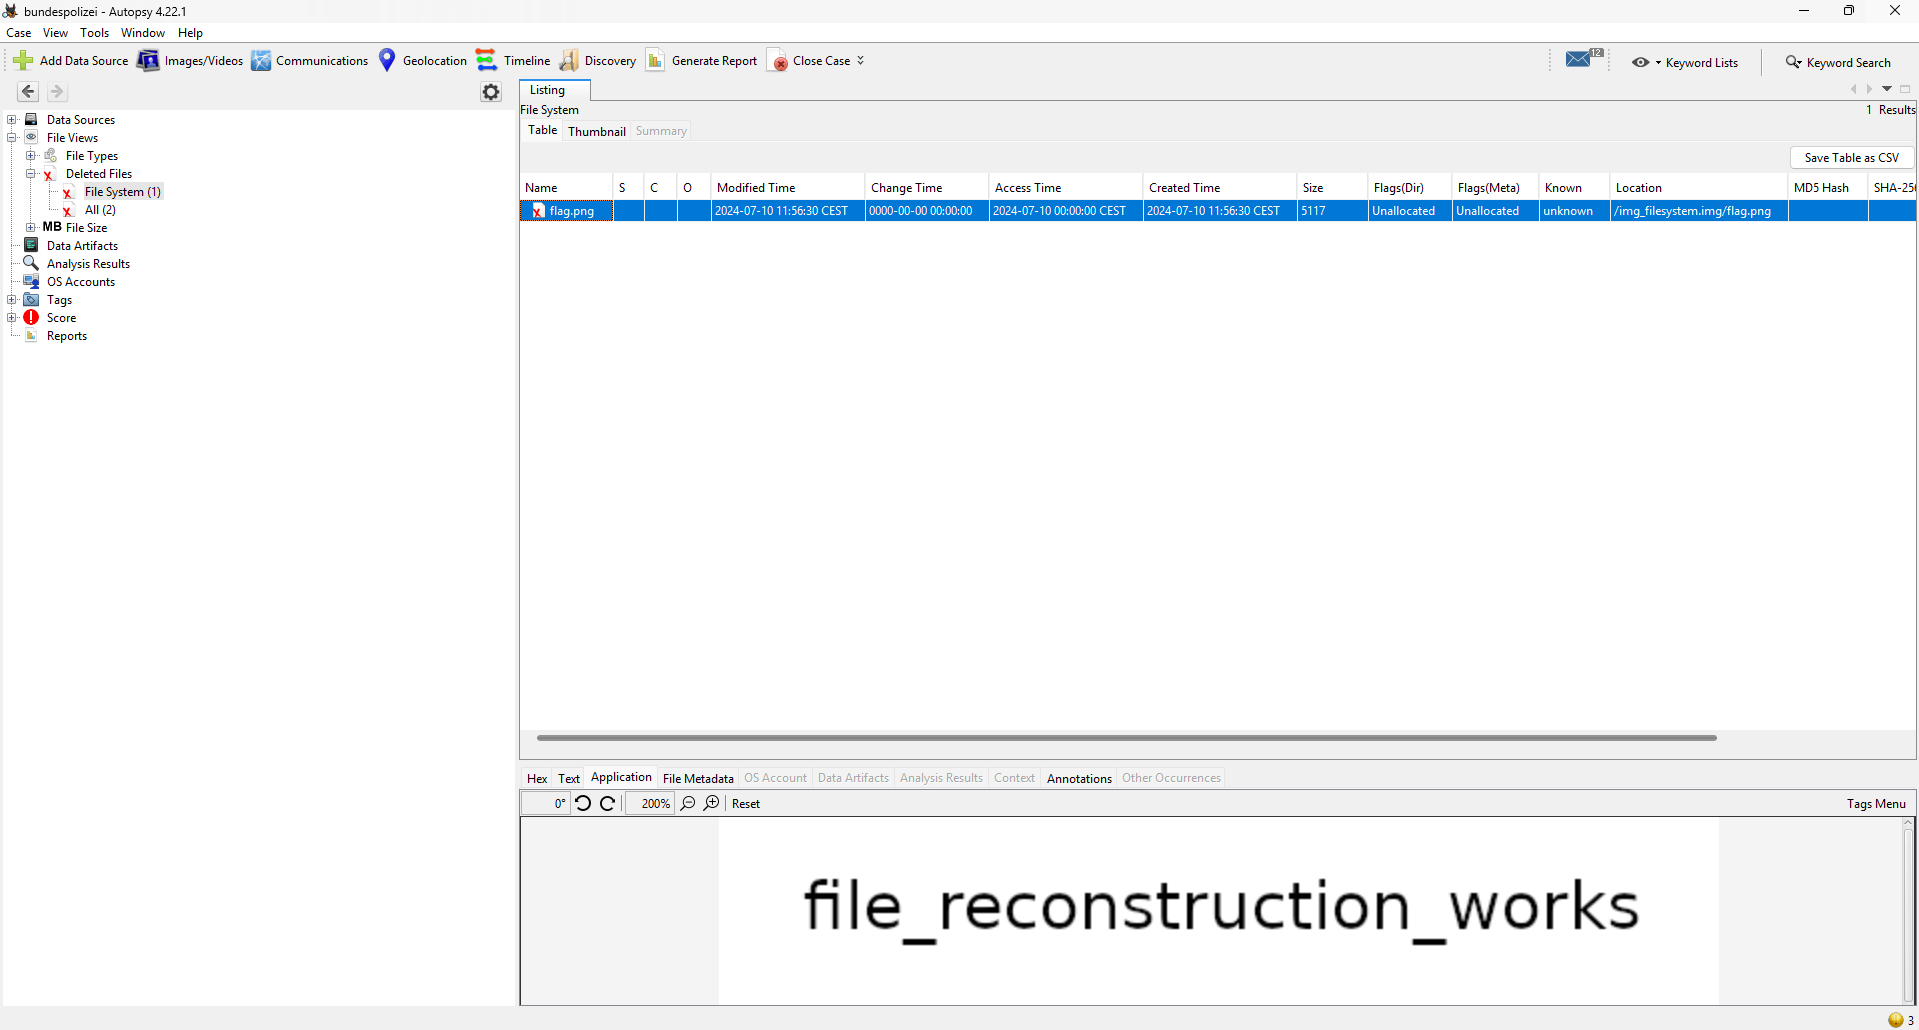
When loaded in a standard PDF viewer, the file looked perfectly normal—suspiciously normal, in fact. My first thought was to check the metadata and the raw file contents for anything hidden. I used pdfxplr, which is fantastic for examining the internal structure of PDFs, and it successfully extracted hidden content from the file. Turns out the flag was tucked away as an image object inside the PDF’s structure.
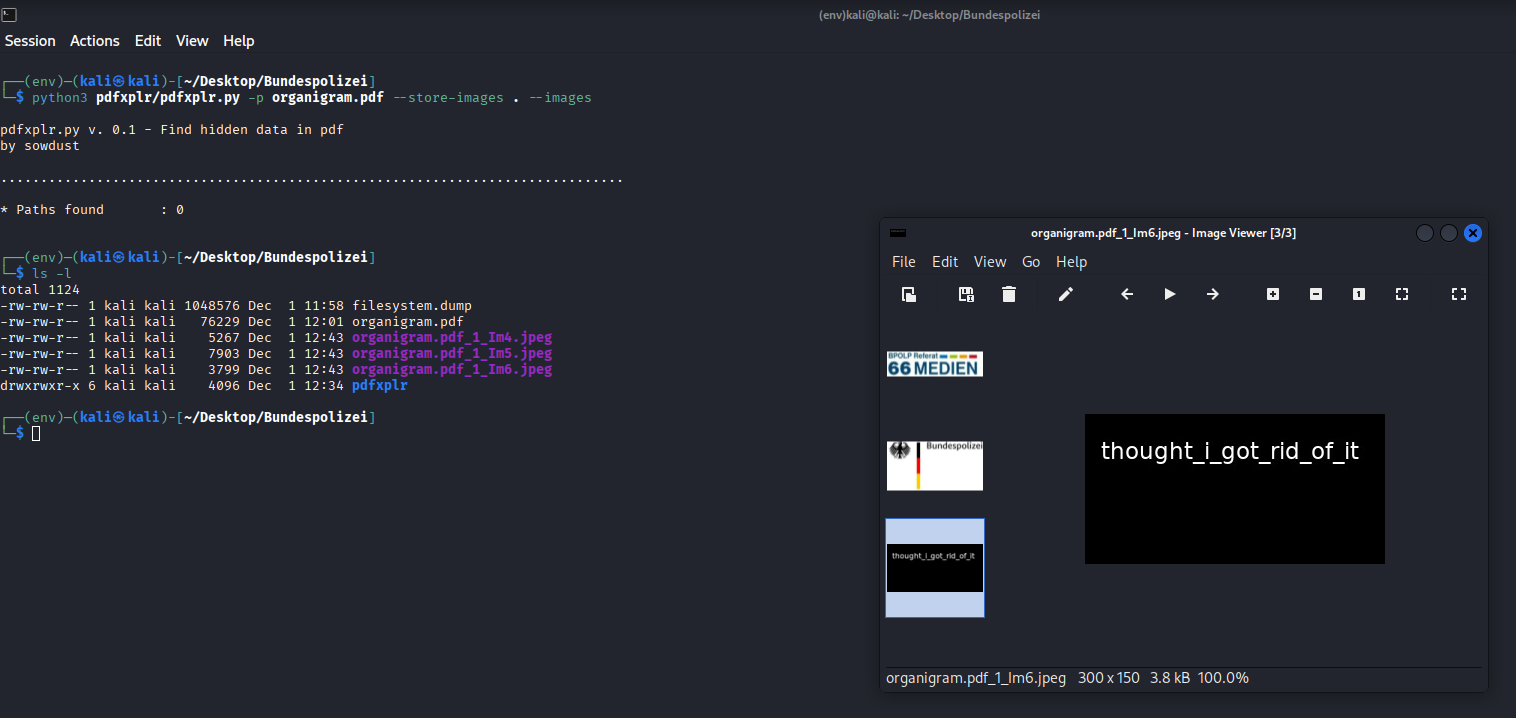
Image files extracted from the PDF using pdfxplr.
Flag 2: thought_i_got_rid_of_it
Challenge 3: Code (Python Debugging) 🐍
For this one, we were given a chunk of Python code with multiple, deliberate errors that needed fixing. This challenge was actually fairly straightforward—once you stopped overthinking it.
In summary, I had to make four key fixes to get the code to successfully print the flag:
1. Missing Alphabet Entry
- Issue: The
secret_tablewas designed for a Base-36 alphabet (0-9, A-Z) but only contained 35 entries. The validation function explicitly checked iflen(chars) != 36and raised aValueError. - Fix: Based on the existing pattern, the key
'X'was missing from the keys and'B'was missing from the values. The fix was to complete the Base-36 map by adding'X': 'B'to thesecret_table.
2. Key Preparation Failure
- Issue: The function
decode_messagecalledkey_preparation(cipher_text[:3]). The slice[:3]creates a string of length 3, butkey_preparationraised aValueErrorunless the input length was exactly 1. - Fix: The call should pass only the first character (the key), correctly using
cipher_text[0].
3. Indentation Logic in decode
- Issue: In the
decodefunction, thereturn numberstatement was incorrectly indented inside theif checksum > 10:block. This meant the function only returned a value if that specific condition was met. - Fix: Unindent the
return numberstatement to ensure the function always returns the decoded number, regardless of the checksum value.
4. Character Encoding
- Issue: The final print statement was configured for UTF-16, which resulted in a scrambled, unreadable string on the console.
- Fix: The output needed to be correctly decoded as UTF-8, by calling the
.decode('utf-8')method on the resulting bytes.
The complete, corrected code can be found in my GitHub repo.
Flag 3: THE_KEY_TO_SUCCESS_LIES_IN_ENCRYPTION
Challenge 4: Reversing (Ghidra Fun) 🔄
For this challenge, we were tasked with reversing a Linux binary.
I started with a quick grep for strings to see if the password was carelessly left in plaintext. No such luck—all I got back was the generic prompt asking the user for their password.
String search within the exectuable
Time for the heavy lifting! I loaded the executable into Ghidra (the NSA’s gift to the reversing community). To begin, I searched for the password prompt string, which led me right to the main function where the “magic” happens.
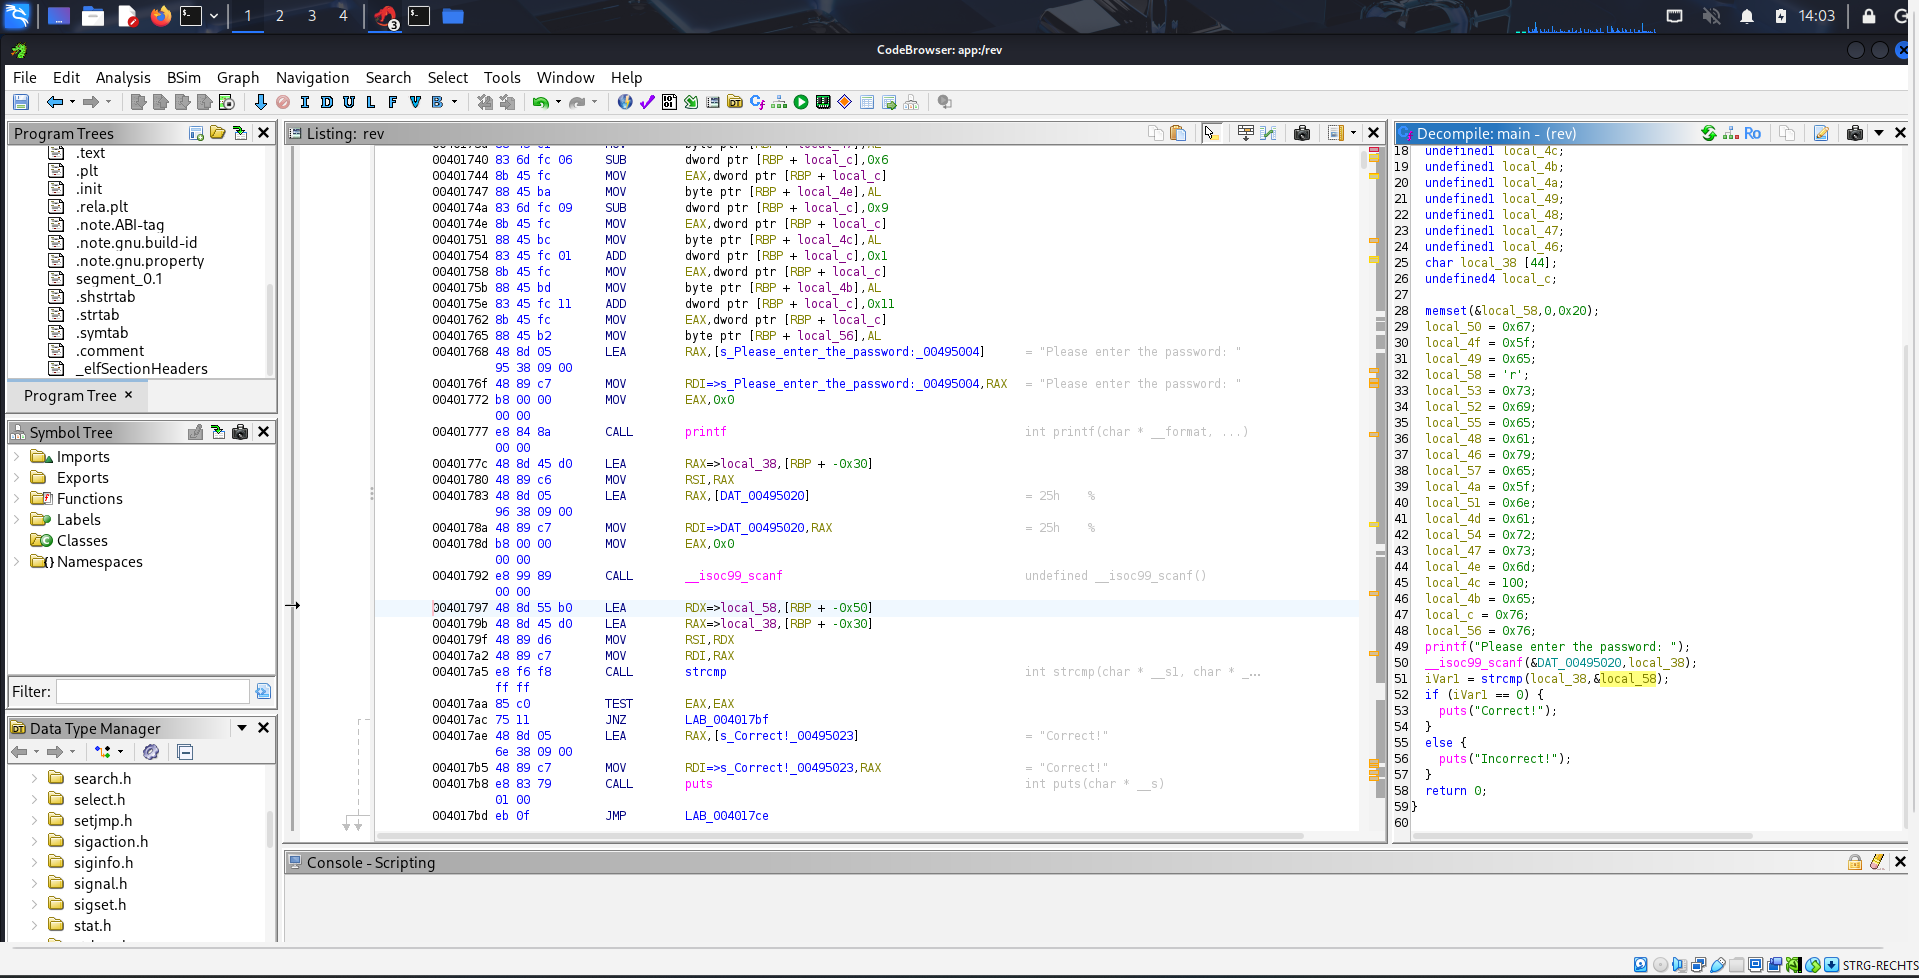
String search within Ghidra
The decompiled code clearly showed a string comparison between the user input and a local variable. All that remained was figuring out the content of that local variable.
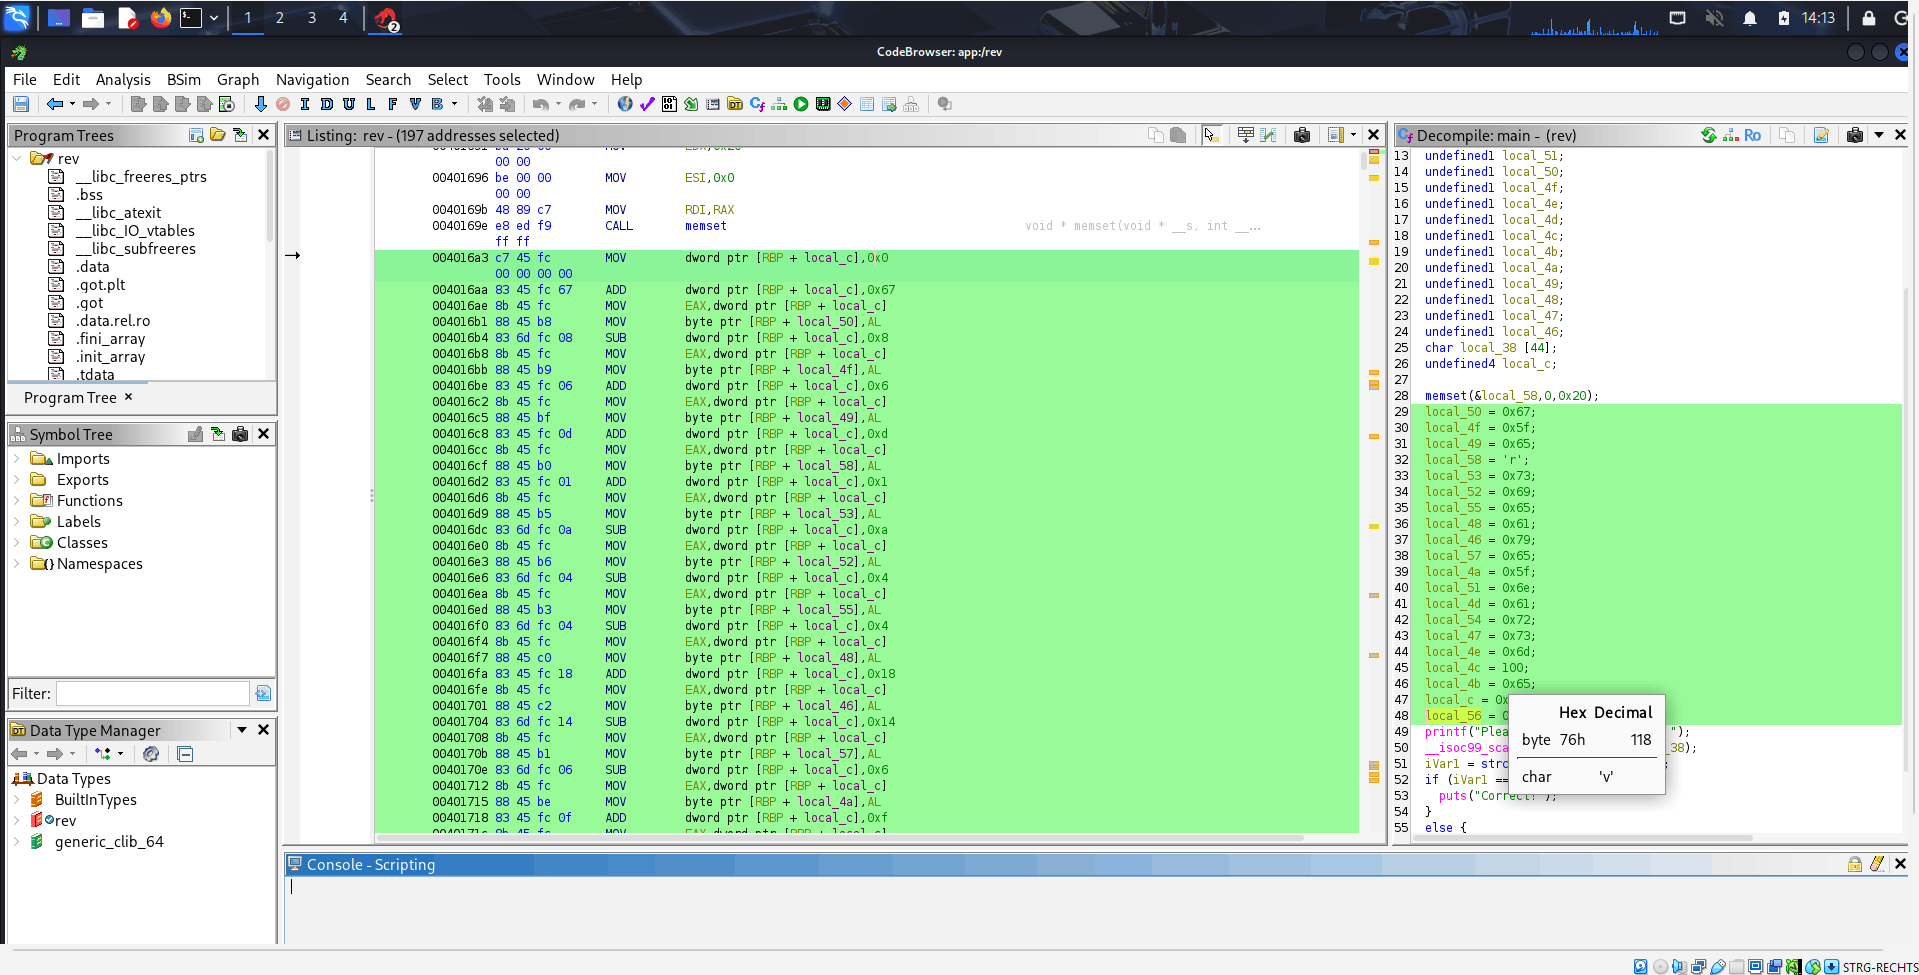
String reconsturction process as viewed in Assembler
Examining the assembly code revealed a clever, if tedious, string reconstruction process. A local stack variable ([RBP + local_c]) was used as an accumulating seed, repeatedly modified by adding or subtracting small integer constants. After each tweak, the least significant byte of this seed was extracted and stored in another byte-sized local variable (RBP + local_XX). When read sequentially by memory address, these stored bytes form the ASCII string “reversing_made_easy”. The password was simply constructed in memory!
Flag 4: reversing_made_easy
Challenge 5: Crypto (Feistel Cipher) 🔑
In this challenge, we were provided with a scientific paper describing a Feistel Cipher. Based on a given ciphertext, the plaintext needed to be retrieved. The biggest hurdle? The encryption key wasn’t given, meaning there were multiple possible key combinations.
I went with the hacky but effective solution: brute-forcing the possible key combinations and then checking if any of the resulting plaintexts had the format of the flags before (Regex ^[A-Za-z_]*$). It’s not the most elegant solution, but it worked! If you know a better, more mathematically sound way to attack this specific cipher without the key, please shoot me an email!
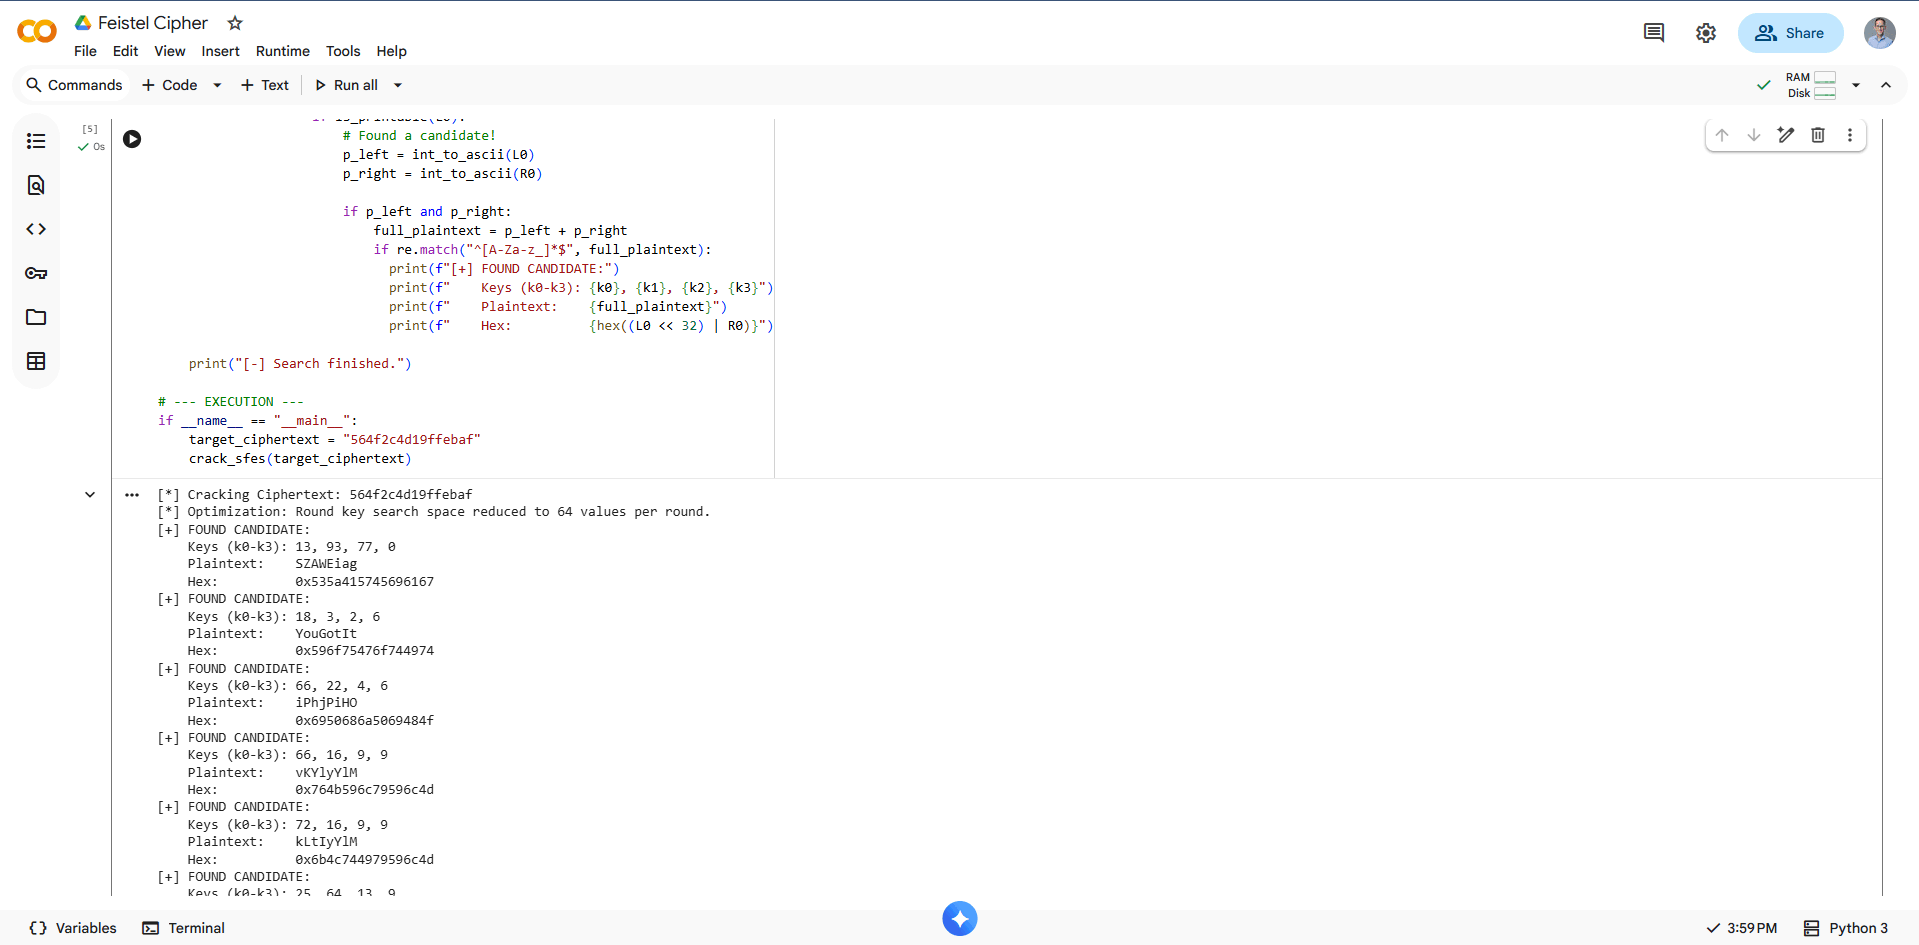
Possible candidates Feistel Cipher challenge
The complete, corrected code can be found in my GitHub repo.
Flag 5: YouGotIt
Challenge 6: Forensics 3 (The Deprecated File) 📂
The goal here was to figure out how an attacker could regain access to the system.
I started by looking for recently modified or deleted files. One file immediately stood out: an unallocated file that contained what looked exactly like a copy of a /etc/passwd file. A red flag for any sysadmin!
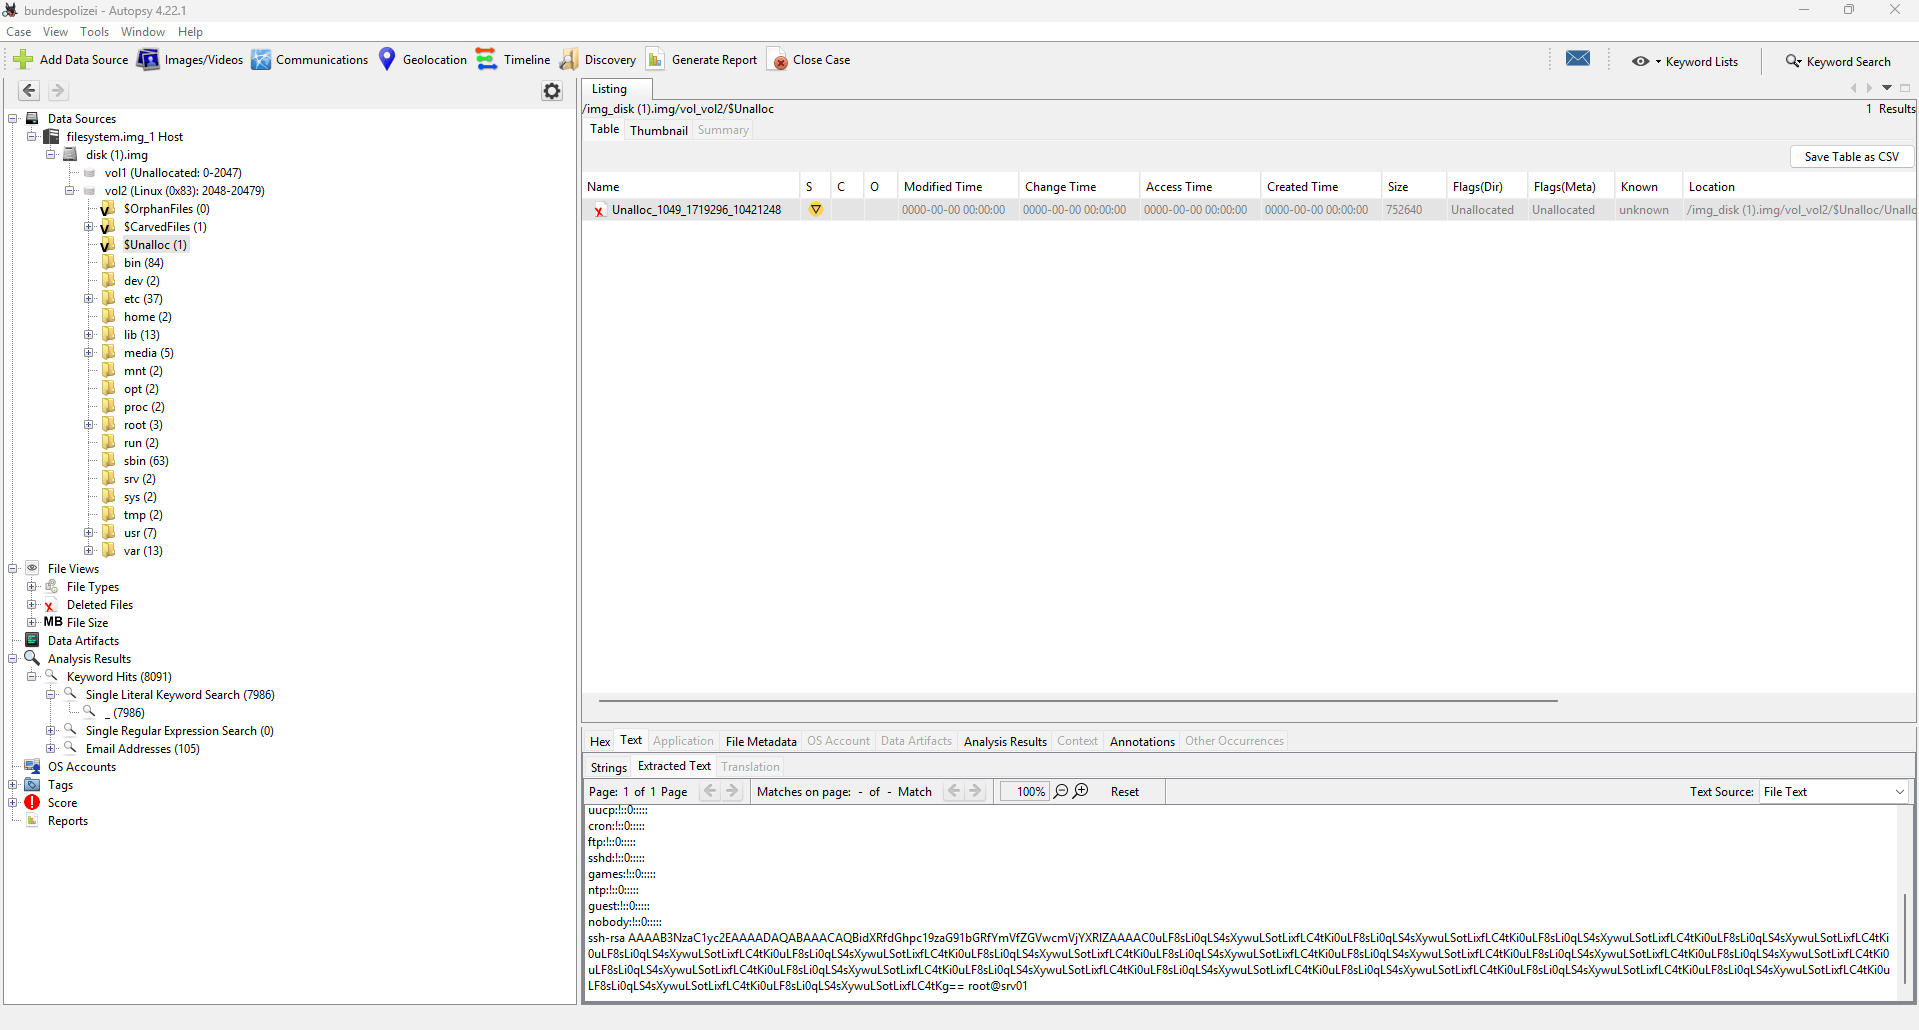
Deleted file within Autopsy.
The string inside this recovered file needed to be decoded. Turns out it was just a simple BASE64 decode to recover the flag.
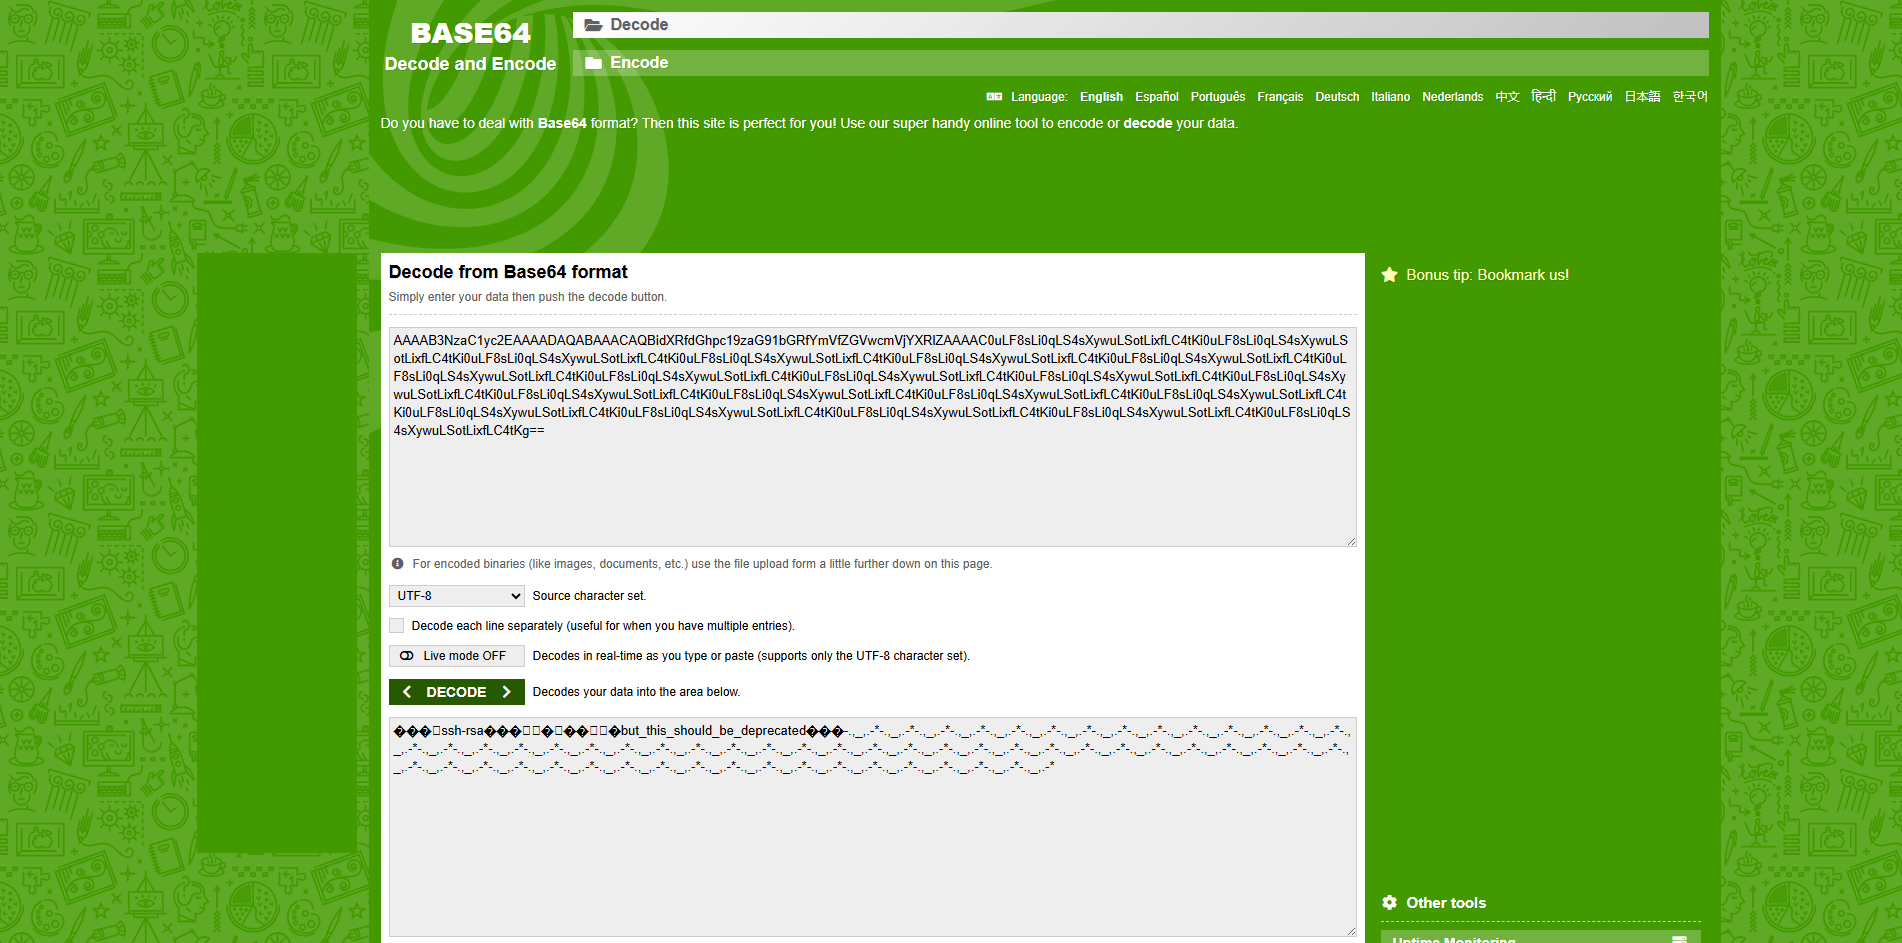
Base64 decode the string using an online decoder.
Flag 6: but_this_should_be_deprecated
Challenge 7: Network (PCAP Fun) 📡
This challenge gave us a .PCAP file containing the hidden flag. Time to fire up Wireshark!
Since there was a decent amount of traffic, I started by hunting for suspicious ports. Port 7199 immediately looked out of place and piqued my interest.
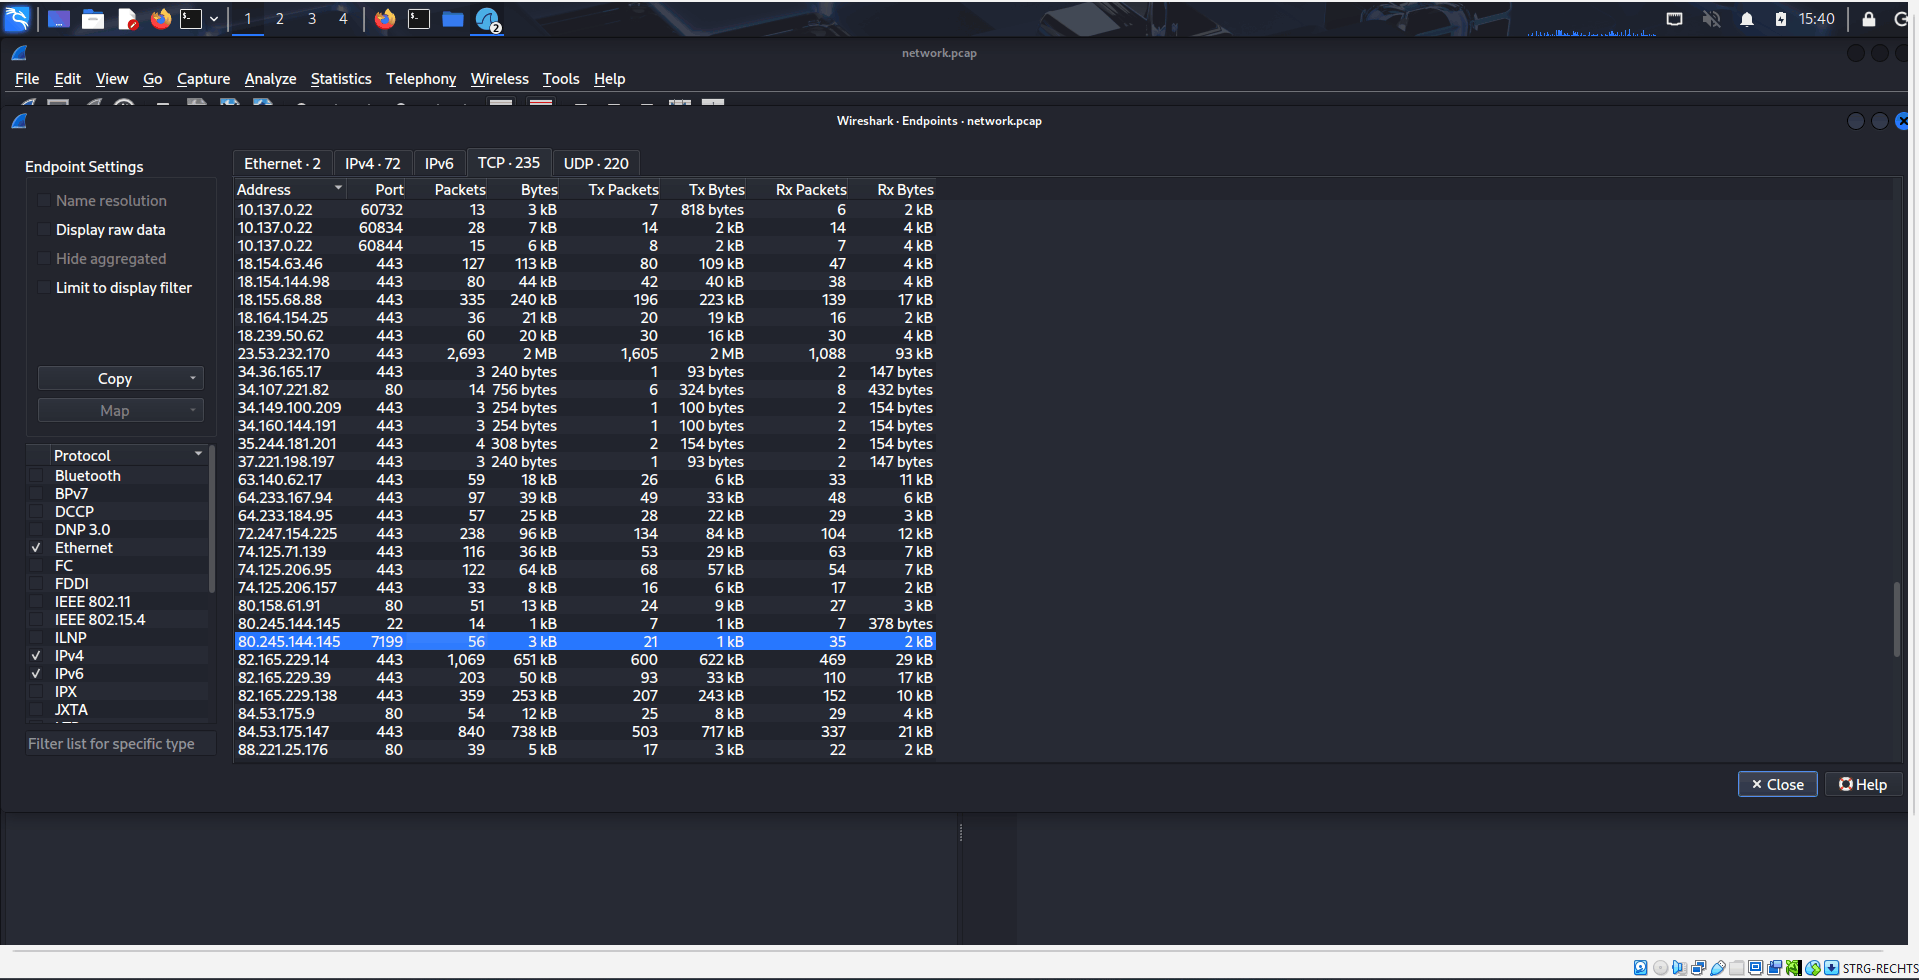
Statistics of the PCAP file in Wireshark.
I set up a display filter for this specific port and, bingo! Each packet contained parts of the flag. My approach wasn’t the most beautiful—I manually noted down the characters from the sequential TCP payloads—but piecing them together gave me the final flag.
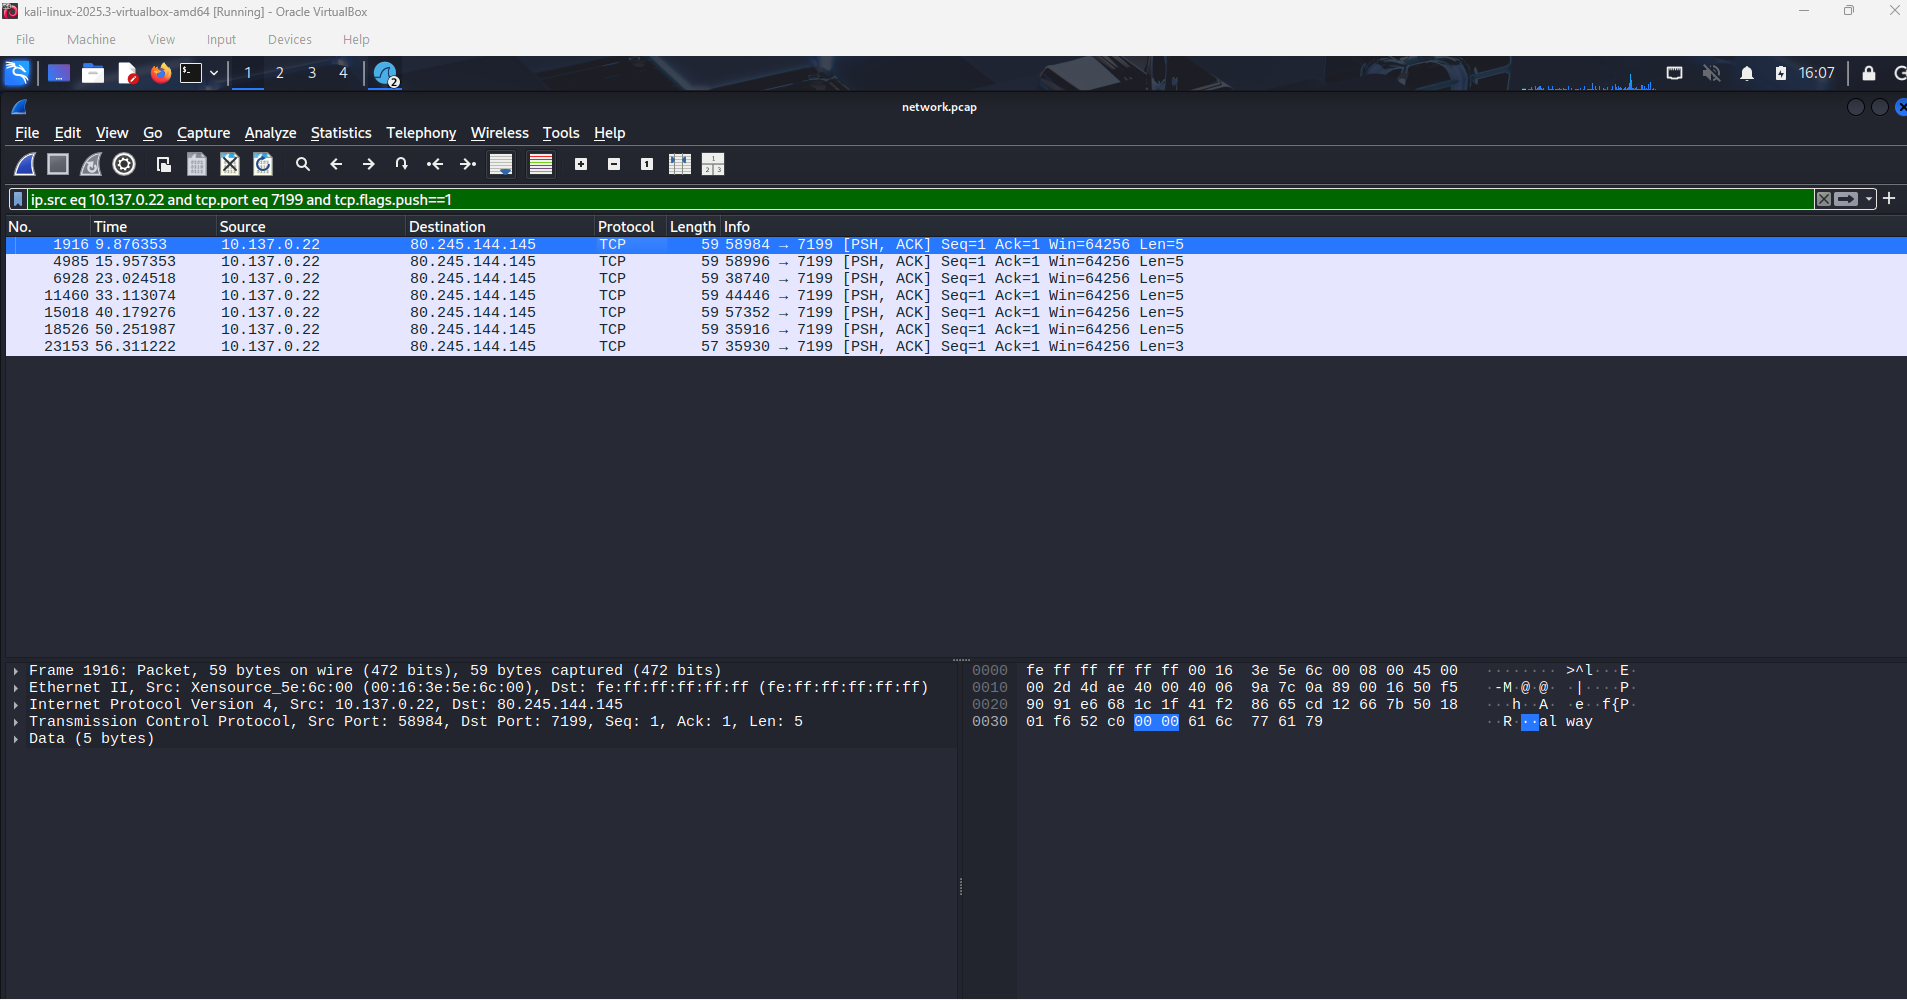
Partial flag in the TCP packet.
Flag 7: always_watch_suspicious_transfers
Challenge 8: Forensics 2 (Steganography) 🖼️
For the grand finale, we were presented with a standard .JPEG file that contained a hidden flag. This smells like steganography!
To solve this, I took inspiration from a great blog post I’d recently read and decided to see if the CyberChef “Extract Files” function could work its magic.
It absolutely could! The function successfully extracted multiple JPEGs from the given file, one of which contained the final flag. CyberChef is a beast!
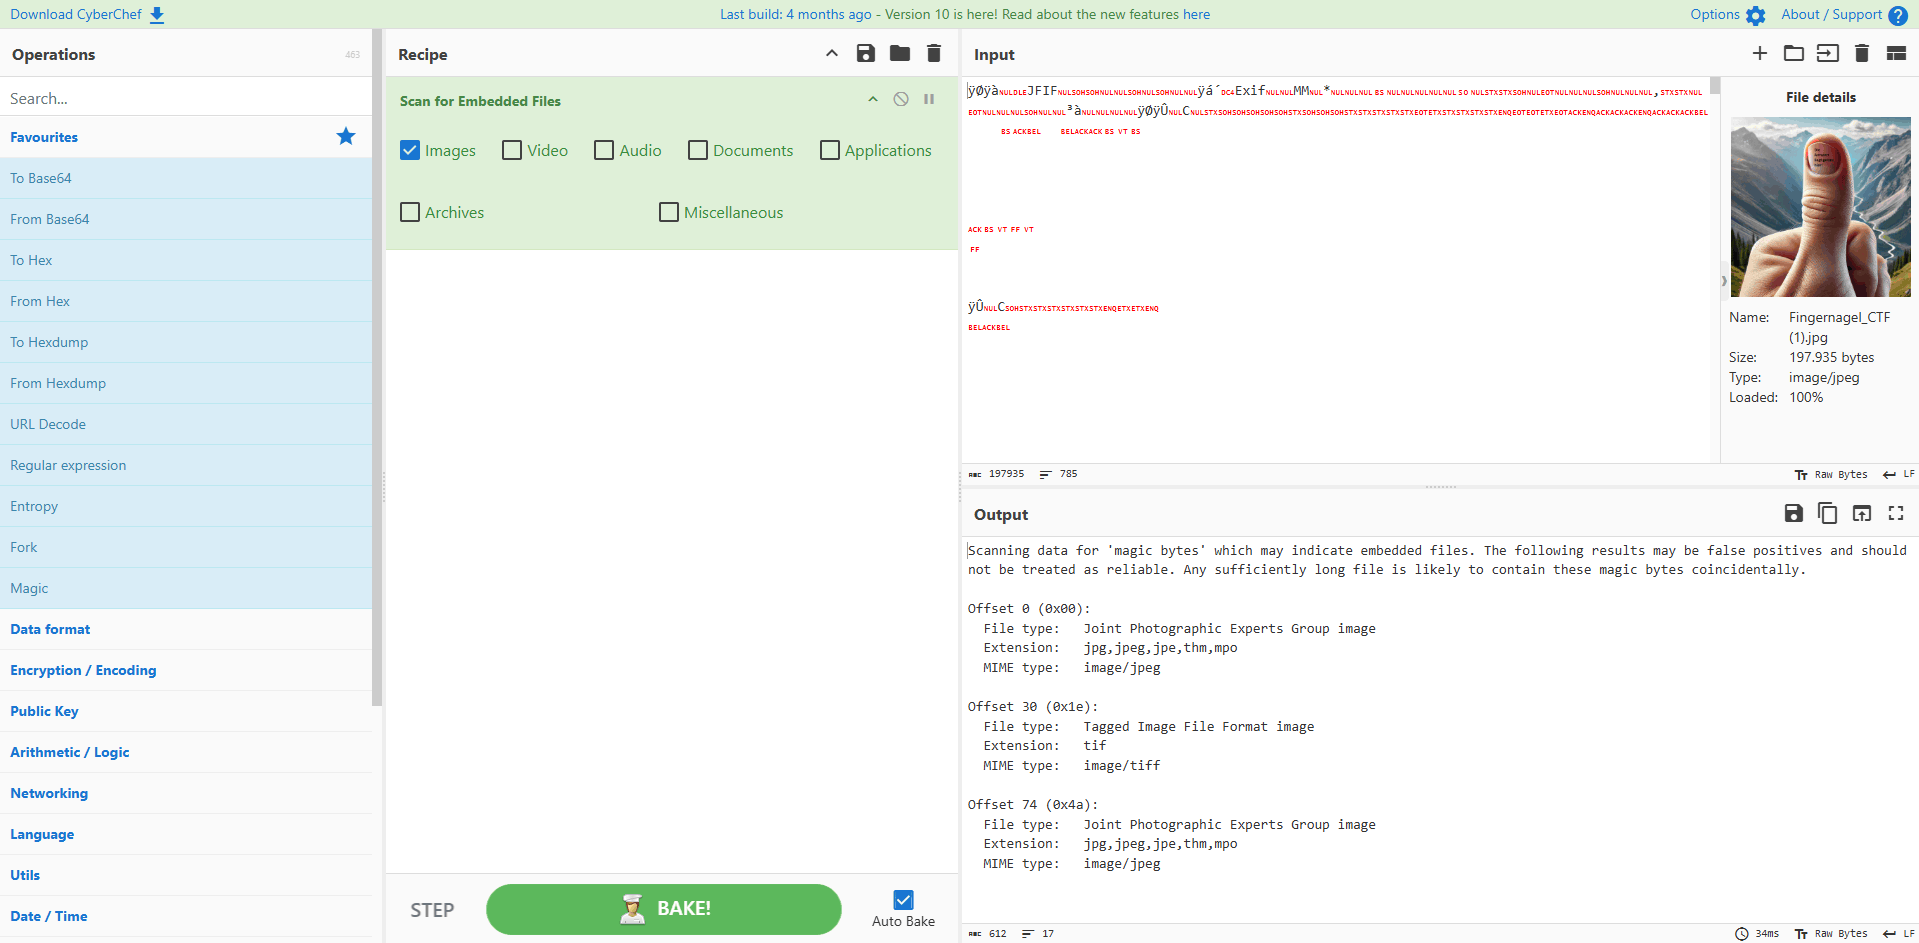
Hidden flag extracted from the JPEG file.
Flag 8: Al-Kindi
Challenge 9: Web (Hidden Challenge) 🌐
The final challenge had a unique entry barrier: it had to be “unlocked” by removing a hidden HTML tag on the challenge overview page. Only then did the link to the final stage appear.
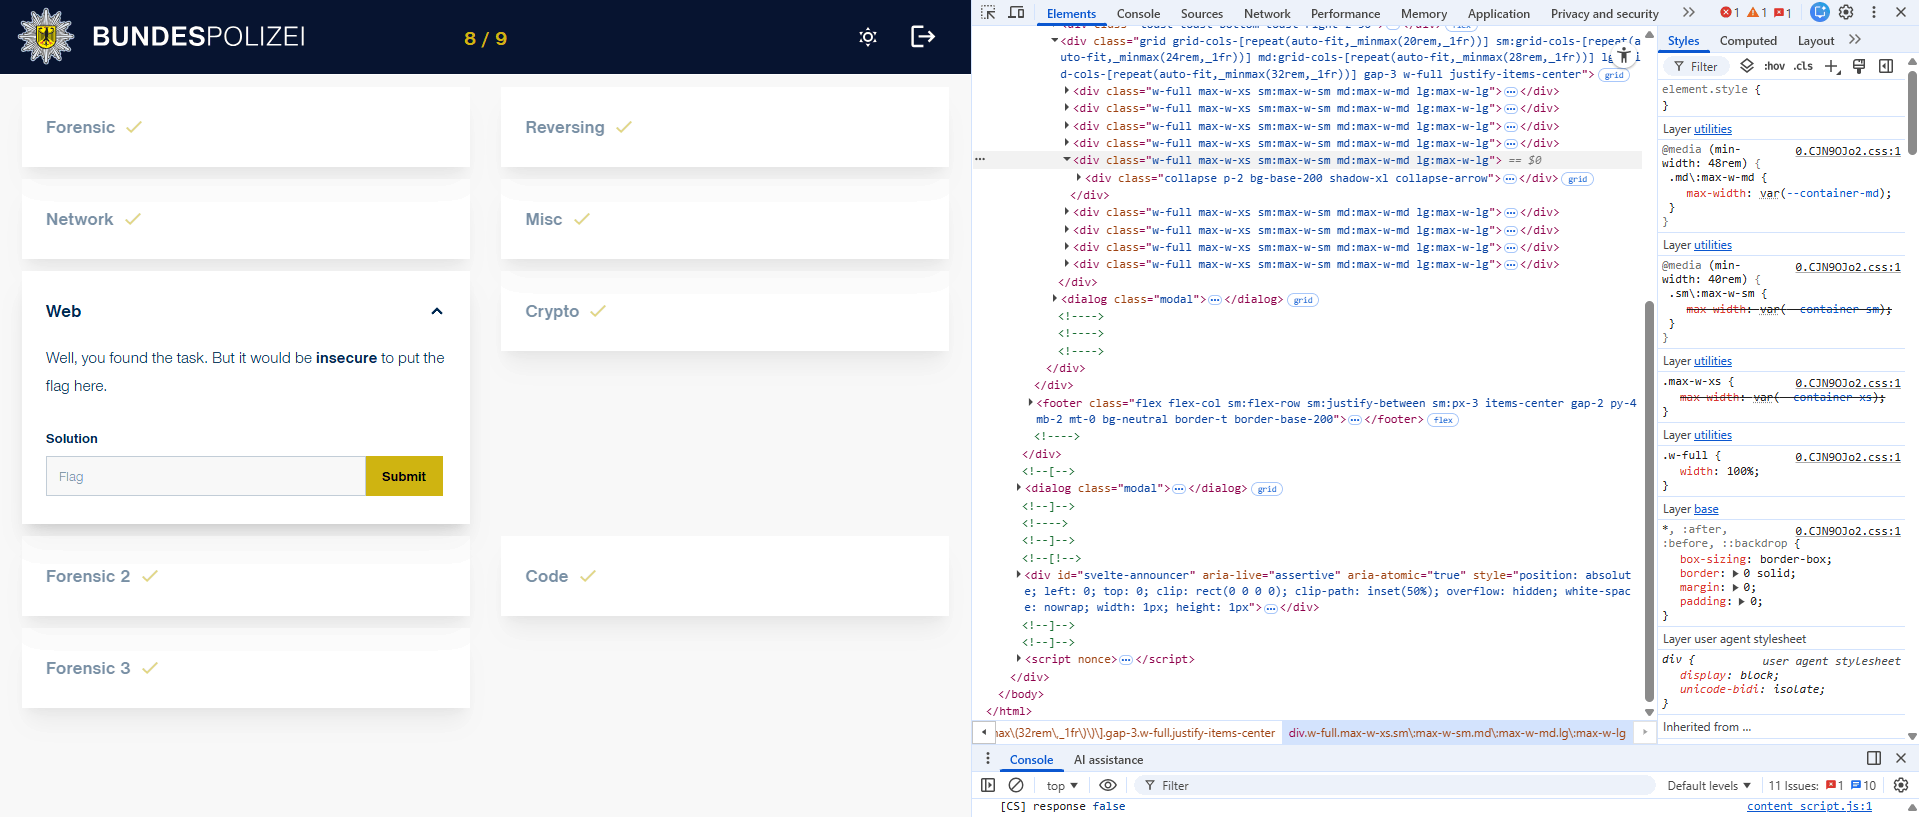
Unlocking the web challenge
This one took me a bit longer than I care to admit! I went down several fun but fruitless rabbit holes, including deep-diving into source code comments, examining cookies, and poking around unused API endpoints. A huge tip of the hat goes to Pius, who gently nudged me toward the correct vector—which was OSINT against the web server itself.
The key was to check the Subject Alternative Names (SANs) of the existing challenge website’s SSL certificate. SANs are commonly used for hosting multiple secure domains on a single certificate, and in this case, one contained a rather cryptic hidden domain: xtklmybf.aws.bundespolizei.de.
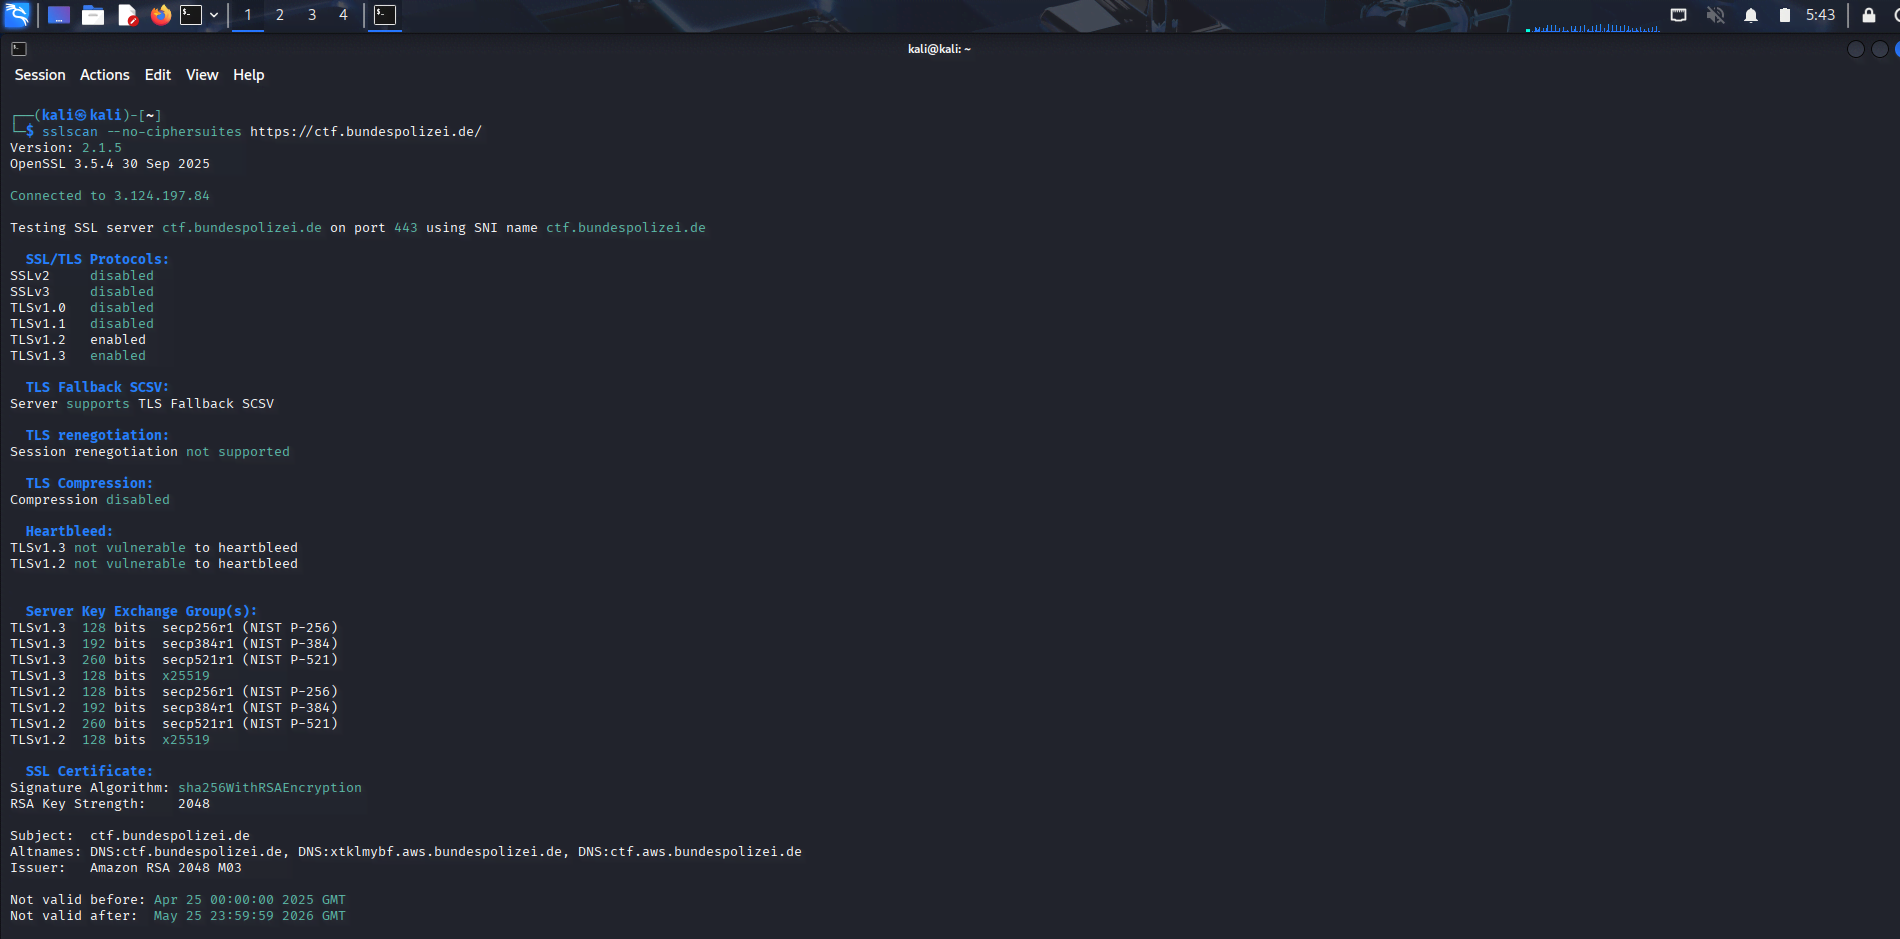
Inspecting the SANs with sslscan
After navigating to this new, mysterious AWS-hosted domain, I was presented with a simple page instructing me to “dig deeper.” A classic hint for the next step.
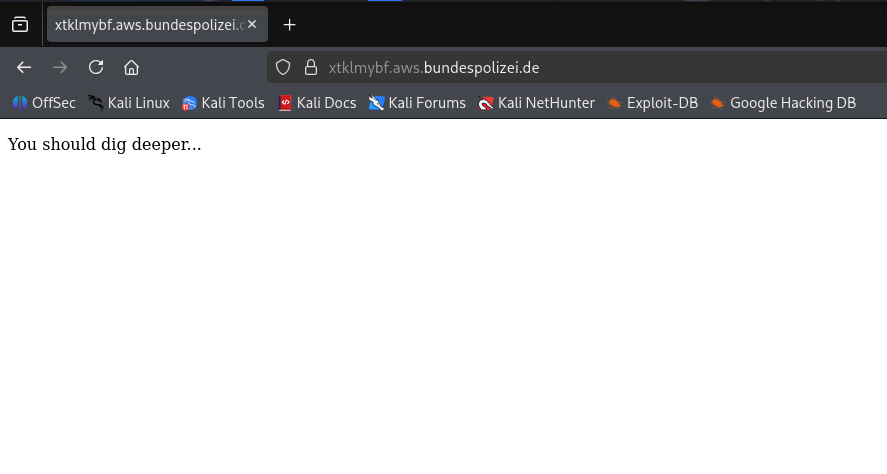
A step in the right direction
The phrase “dig deeper” immediately pointed to the dig command (Domain Information Groper). I inspected the TXT records for the new domain, which are often used for verification or storing short pieces of data. And there it was—the final flag, cleverly hidden in the DNS records!
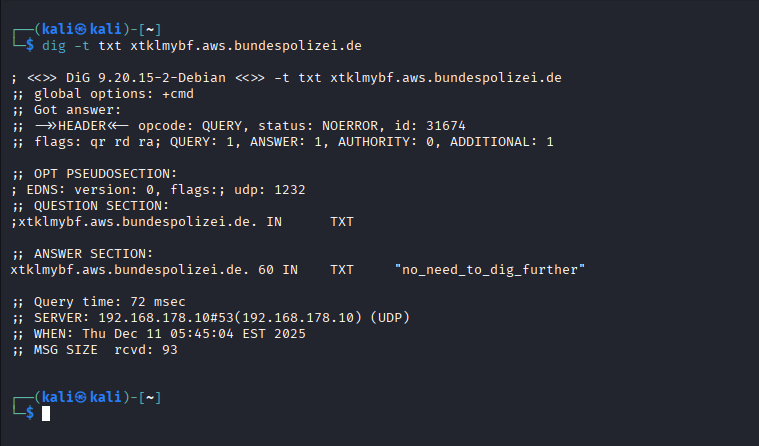
Using dig to inspect the TXT records
Flag 9: no_need_to_dig_further
Final Thoughts
The Bundespolizei CTF was a brilliant exercise blending crypto, reversing, and forensic puzzles, making the whole event a fantastic brain teaser.
It was a great opportunity to sharpen those Ghidra, Wireshark, and CyberChef skills. If you’re looking for an official, well-designed, and easy-to-follow CTF with a fun theme, you absolutely need to mark the next Bundespolizei event on your calendar.
Until the next pwn, happy hacking! — Alex