Repairing a Canon Scanfront 220p With a Disk Boot Failure
I recently got myself a Canon ScanFront 220p Scanner to empower my efforts to quickly digitalize a huge amount of documents, which I’d carefully accumulated through the past couple of years. While my scanner, which I got for 42 € of eBay Kleinanzeigen was from a technical point in great conditions, I know it had one “minor” software issue: It wouldn’t boot.
The Problem
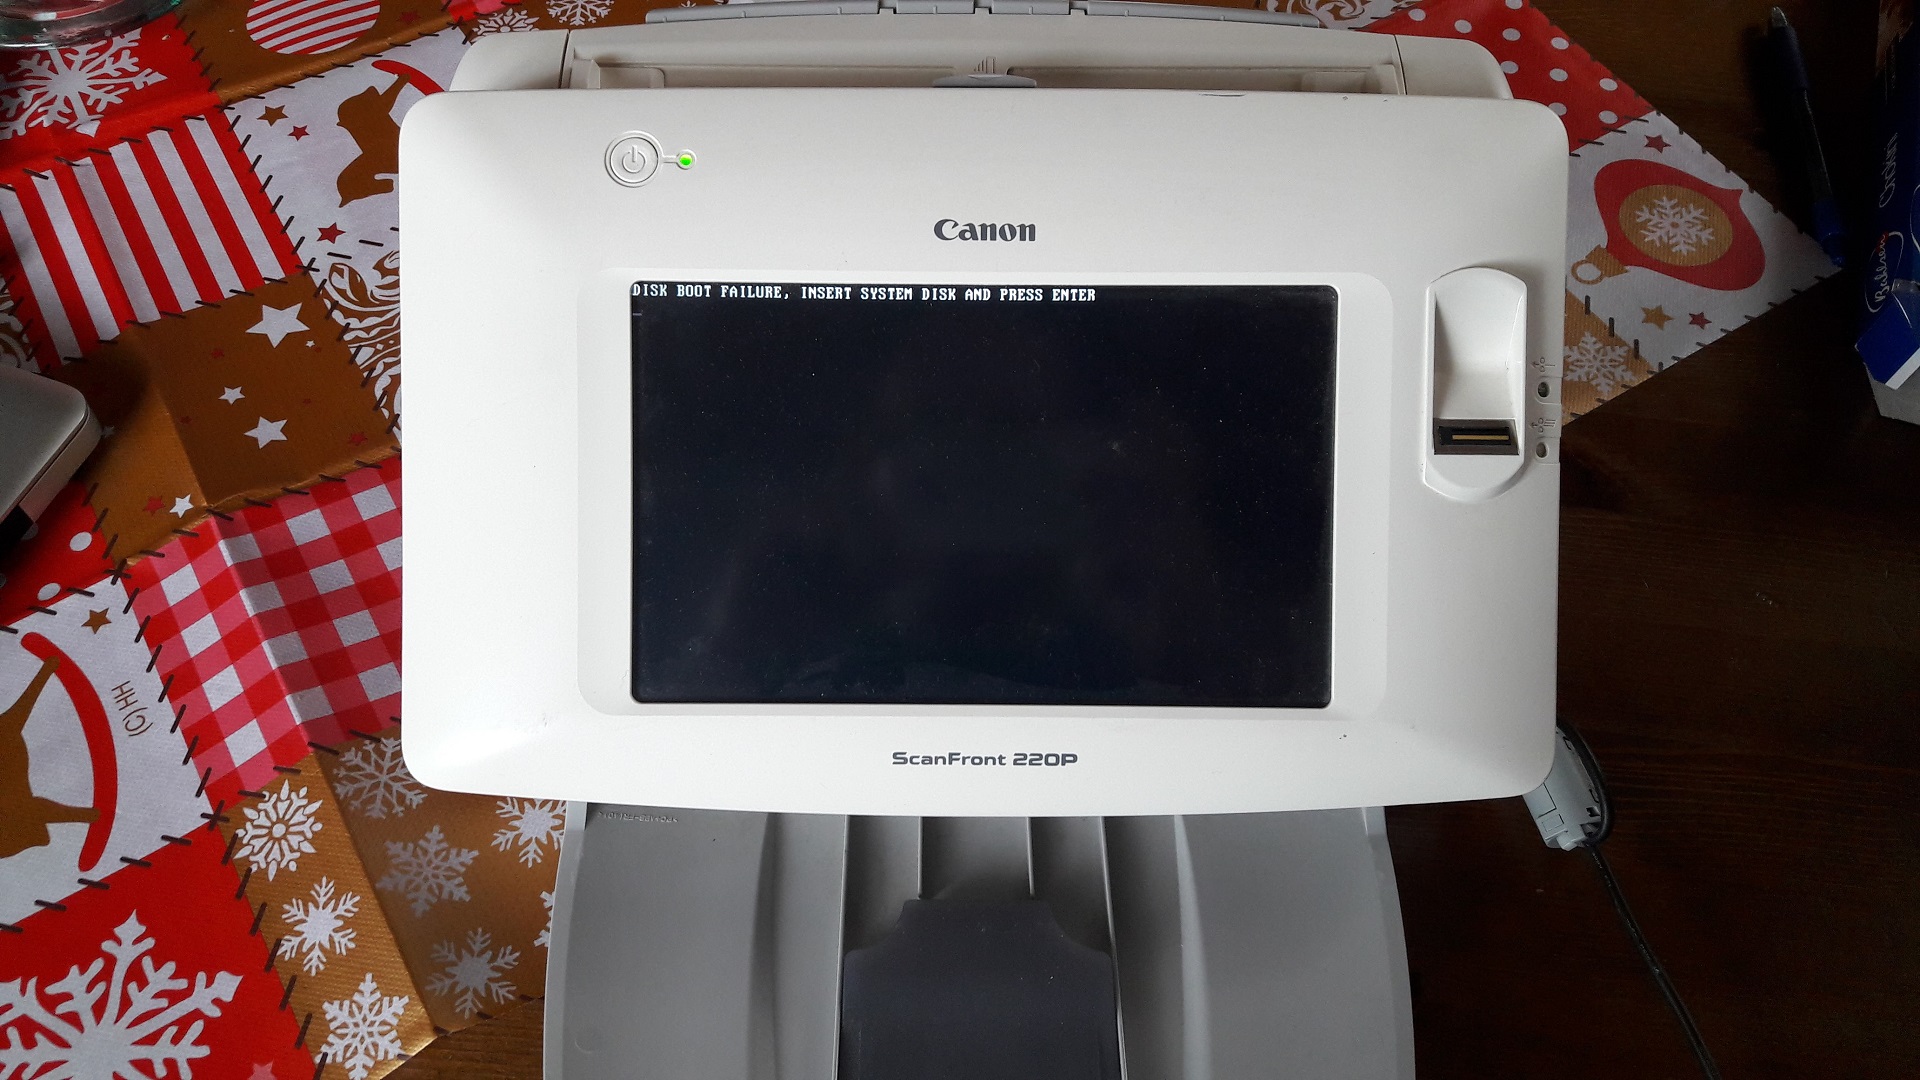
Every time I tried to boot up the scanner it gave me a Disk Boot Failure error. This error typically occurs for PCs that have a separate hard drive, which has either gone missing or that was corrupted. This scanner, however, only has a 128 Mb memory chip that is soldered onto the motherboard ultimately leading me to the conclusion that the Windows CE must have been corrupted.
My initial idea was trying to reset the scanner by pressing the little reset button on the side of the scanner. While that led me to a service menu (Recovery Tool), there was no way I could reset anything. I assume this option is only meant for Canon technicians that have a specially crafted USB drive.
🎯 The Solution
I’d, therefore, spent some time googling and ultimately found this post by the wonderful Geoff Breach. In his post he explained on how to reset the administrator password on a Canon ScanFront 220p. While our issued differ, the main approach of factory resetting the Canon ScanFront 220p, works for both issues alike.
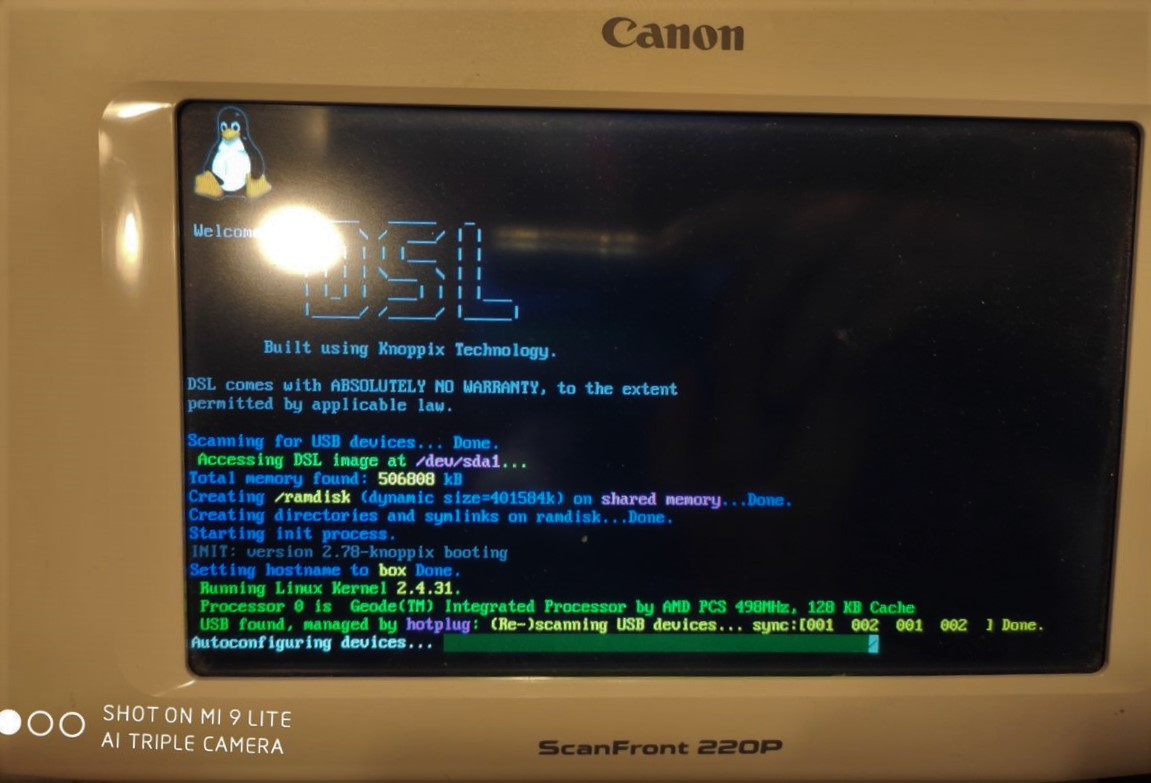
🐧 Creating a bootable USB drive and booting from it
The Canon ScanFront 220p is basically a full-fledged PC that comes with a Phoenix AwardBIOS, a couple of IO (USB ports, PS/2, ports), an 10/100 Ethernet Port and a 500 MHz AMD CPU. To boot a Linux on there, I knew I had to go for something small. As the Linux system is only required for copying/moving two files, anything bloated wouldn’t have made sense anyway. So I went for Damn Small Linux core often referred to as DSL Linux.
Creating the bootable USB drive is quite straightforward:
- Download the latest version from the Damn Small Linux website
- Image the iso file using
UNetbootin - Plugin a keyboard and the newly created USB drive
- Change into the BIOS by pressing the
DELkey as soon as the scanner starts up - Change the boot order by going to
Advanced BIOS Featuresand selecting theUSB-HDDas the first boot device - Save your changes and exit the BIOS
- Reboot
After the reboot, you should be presented by DSLs boot menu.
Note: I have to admit that it took me a couple of times until I got the scanner booting from the USB drive. Ultimately a 4 GB USB 2.0 SanDisk stick in the lower USB port did the trick for me. If it doesn’t work right away it’s worth trying a different stick/different order.
🏭 Carrying out the factory reset
Once inside the DSL boot menu, make sure to quickly hit a key to avoid the boot menu from timing out. DSL comes with a couple of different boot modes, though, the only one that worked for me was dsl 2.
The boot process itself was fairly slow (due to the limited hardware) and also took me a couple of attempts. Once in the prompt, I was able to carry out the actual factory reset.
At first, I had to mount the hda1 partition, which represents the scanners flash hard drive.
| |
Once the partition was mounted within DSL, I could traverse to Documents and Settings folder of Windows CE, where a magical file called system.hv is located. This hive file is basically Windows CE’s registry.
| |
What’s great about the system.hv is that it get regenerated, if it’s missing. Ultimately, leading to a factory reset. In order to trigger this process, we simply rename the existing hive file.
| |
We are almost done. However, there is also a user.hv which has to be restored. This one is located within the Default sub directory. Like before, we’ll rename the file.
| |
Once that is done, we can unmount the scanner’s hard drive and shut down DSL.
| |
When you see a message that Linux has been halted, you can remove the USB drive and shutdown the scanner completely.
Start the scanner once more, change into the BIOS by pressing the DEL key and make the HDD-0 the first boot device again. After that, a completely factory reset version of Windows CE should boot up. Go through the touch calibration process and soon after you will be able to (re)enjoy a fully functioning Canon ScanFront 220p Scanner 🎉.